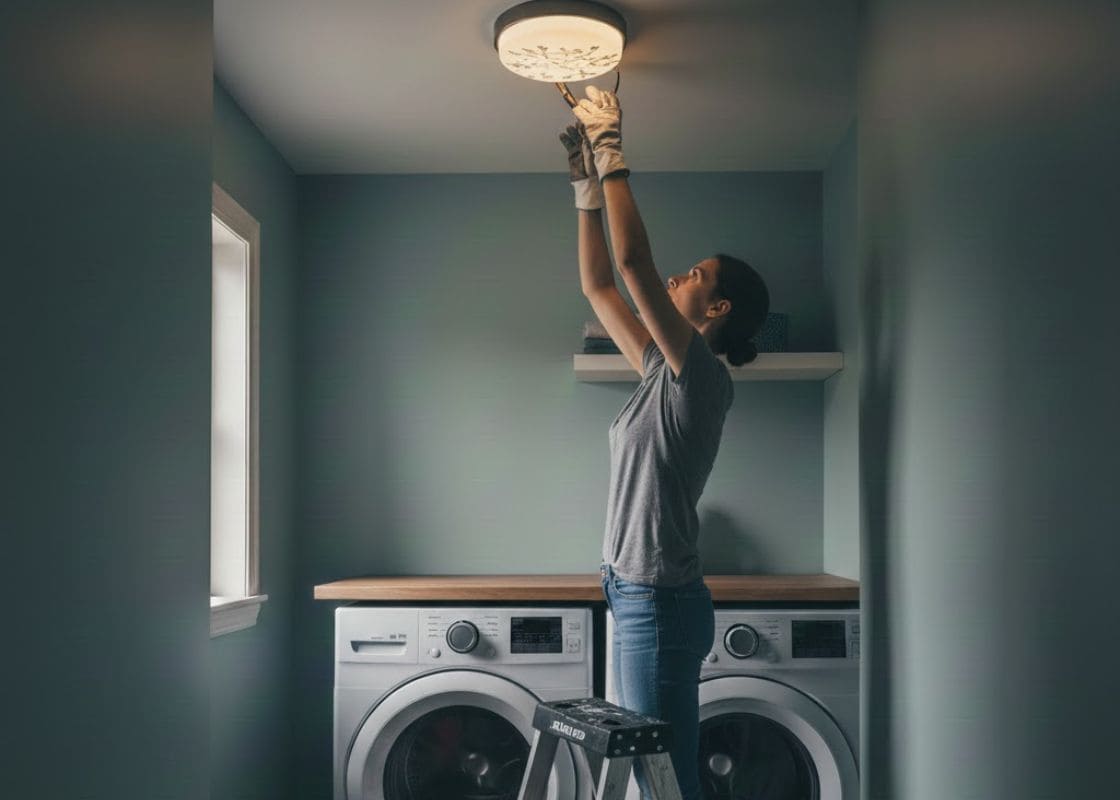
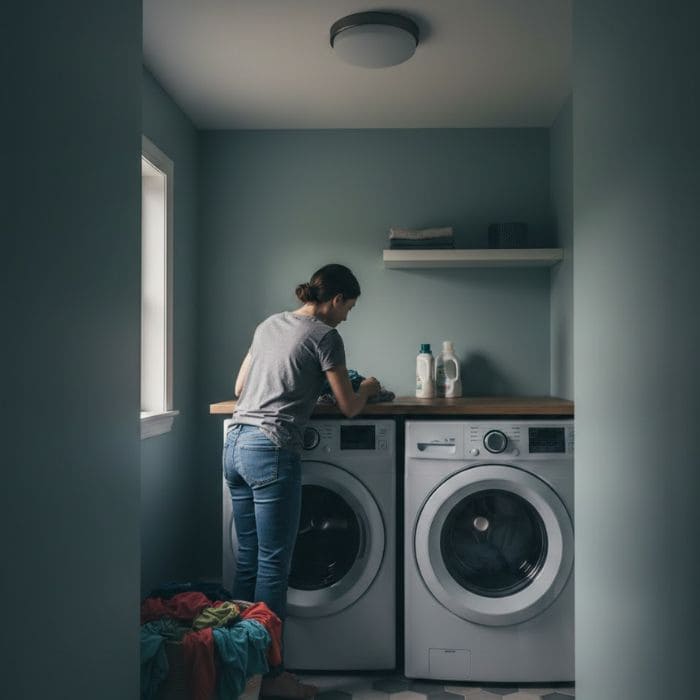
One week ago, I was doing the least dramatic thing imaginable, which was loading clothes into the washing machine, and the ceiling light just turned off.
No flicker, no warning, no slow dimming like a polite goodbye. It was on, then it wasn’t, and I stood there in the half-dark with a damp towel in my hands like the house had decided to start playing little tricks on me.
It felt almost funny in an exhausting way, because this month has been full of “oh, that’s failing now too,” and I had just dealt with a garage door issue recently, so the timing made me laugh out loud for a second even though I was annoyed.
The light had worked for years, and I rarely touched it or thought about it, which is probably why it chose a random laundry moment to quit, like it wanted an audience.
I tried the obvious things first, because hope is a habit. I checked the switch. I checked the bulb. I stood there long enough to bargain with it, as if stubbornness could bring electricity back.
Nothing worked, and by the time I finished laundry that day, I knew I had to stop postponing it and actually replace the fixture.
The only problem was money, because I’m trying to save this month, and the idea of spending a lot on a laundry-room ceiling light felt ridiculous, even if I do believe small upgrades change how a home feels.
So I decided to buy an affordable fixture on purpose, then make it look like a luxury one.
The Budget Plan That Made This Feel Possible
I went hunting for a designer practical, safe, and cheap, because I wanted bright, reliable light first, and style second.
That’s why I ended up at the Habitat for Humanity Greater Boston ReStore in West Roxbury, because it’s literally a home improvement outlet with an always-changing selection of donated items, including lighting, and shopping there supports their mission.
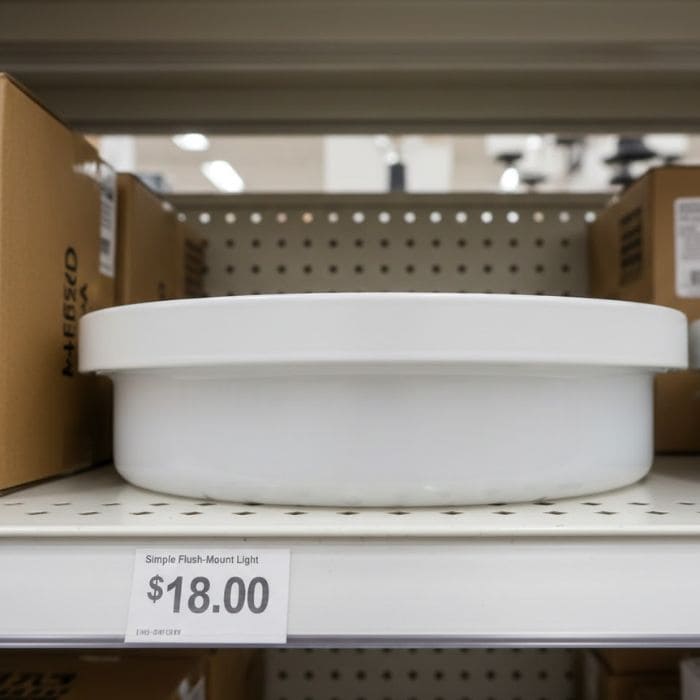
I found a simple flush-mount ceiling light, the kind people ignore because it’s not exciting, and that was perfect for my plan because boring fixtures are basically blank canvases.
It was a clean white base with a basic round diffuser, around 13 inches wide, and it was priced at $18, which felt like I had found the one reasonable thing in a month full of repairs.
It didn’t look luxurious in the store, but it looked solid, and I could picture it with a warmer finish and one detail that made it feel intentional.
The quick sizing check I did before committing
My laundry space is small, about 6 ft by 8 ft, and the ceiling is the typical 8 ft height, so a 13-inch flush mount sits nicely without feeling too big or too tiny.
In a small utility space, you usually want a fixture that gives even light without hanging low, and flush mounts do that well.
The Helpful Store Owner Moment That Saved Me From Buying the Wrong Thing
The ReStore staff member I spoke with was the kind of person who doesn’t make you feel silly for asking basic questions, and I told him exactly what I needed: something bright for laundry, something that wouldn’t look dated, and something I could make prettier without spending more money.
He reminded me to check two things before I brought it home: that the fixture was complete, and that the mounting hardware was there or easily replaceable.
It was such simple advice, but it saved me from the classic mistake of buying a good deal that turns into three extra trips for missing parts.
The Part I Did Not DIY: The Electrical Swap
I’m going to say this clearly because it matters: I did not do electrical work alone.
I turned off the breaker and had help swapping the fixture, because wiring is not the place for guesswork, and I care more about a safe house than a fast blog story.
If you’re doing something similar, getting a licensed electrician or a qualified handyman for the install is the calmest option, and it keeps the project from turning into a stressful one.
Everything I’m sharing next is the fun part: the makeover that turns a basic budget light into something that looks custom.
How I Made a Cheap Ceiling Light Look More Expensive
Materials I used
- Spray primer made for metal or glossy surfaces
- Spray paint in a warm brushed brass or soft champagne tone
- A small stencil with a simple repeating pattern (I chose something subtle, not busy)
- Acrylic craft paint for the stencil
- Painter’s tape
- Fine sandpaper (around 220 grit)
- A soft cloth and rubbing alcohol for cleaning
- Optional: matte clear coat for durability
Step 1: Clean and prep like you actually want it to last
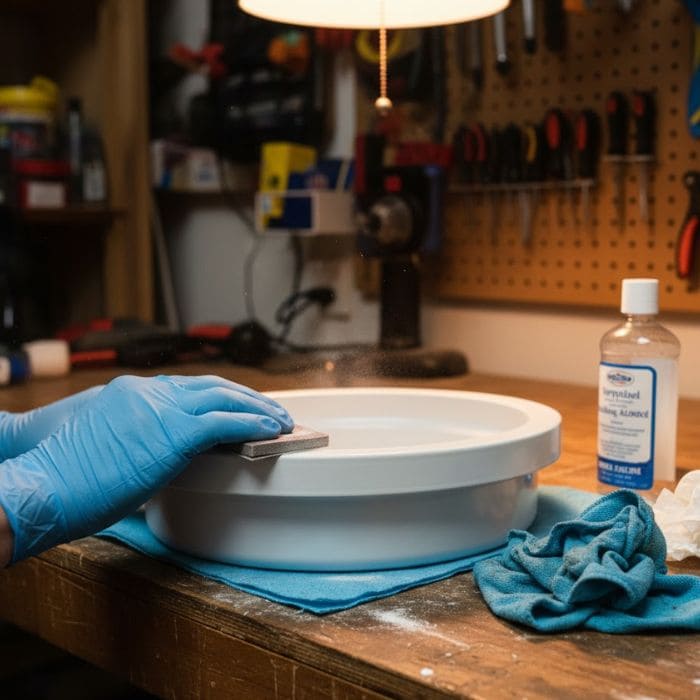
I took the trim ring and any paintable pieces off the fixture and cleaned them well, because paint only looks expensive when it sticks smoothly.
A quick wipe-down with rubbing alcohol removed residue and helped the finish feel more even.
Then I lightly scuffed the surface with fine sandpaper, just enough to remove shine, not enough to scratch it up, and that step alone made the paint grip better and look less like a craft project.
Step 2: Prime first, because glossy surfaces love to betray you
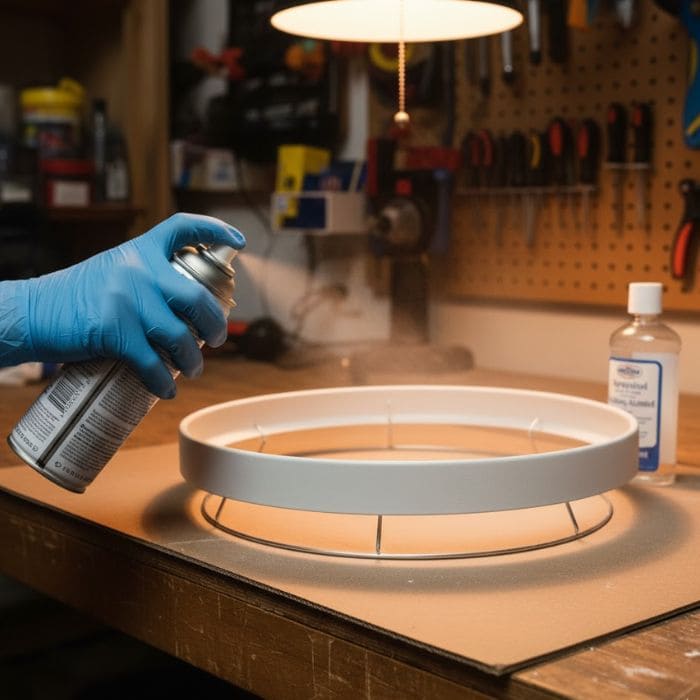
Primer is what keeps spray paint from chipping the first time you wipe dust off a fixture.
I used a light coat, let it dry, then did a second light coat, because thin layers always look smoother than one heavy coat.
If you’re painting any metal parts, Krylon’s own guidance notes that metal may need appropriate priming for the best results, especially when rust is involved.
Step 3: Spray paint in thin layers, then stop before you ruin it
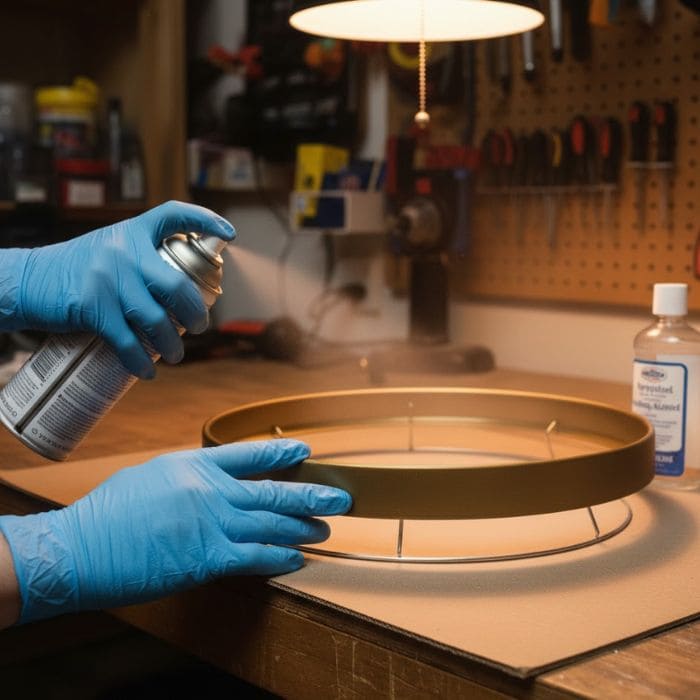
This is the part where people get impatient, and impatience is what makes paint drip.
I sprayed the trim ring in several thin coats, holding the can about 8 to 12 inches away, and I rotated the piece as I went so the coverage stayed even.
I let it dry fully between coats, and once it hit that soft, warm metallic look, I stopped, because one extra coat is often the coat that makes it look thick.
Step 4: The stencil detail that made it feel custom
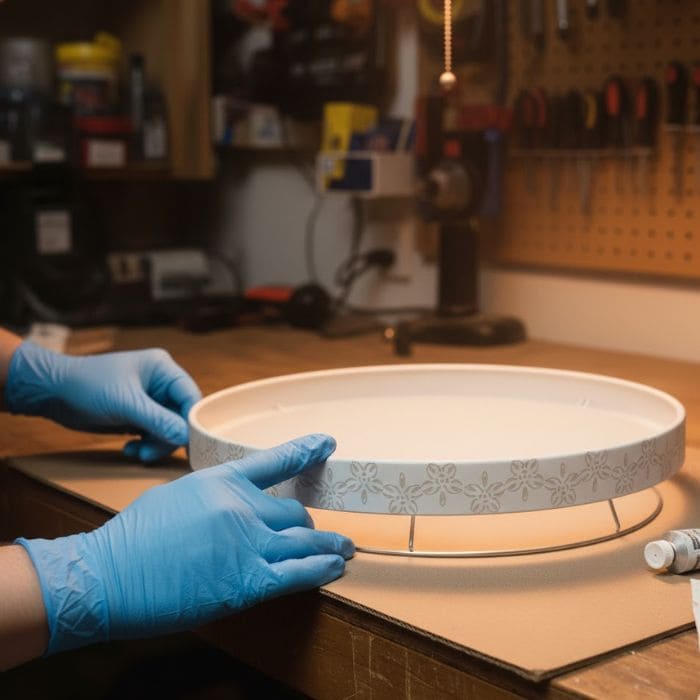
My fixture had a plain diffuser, and instead of leaving it blank, I added a very soft stencil pattern around the outer edge. I chose a small, simple motif and repeated it in a loose ring so it felt like a design choice, not a craft store accident.
I kept the stencil paint slightly dry on the brush, then dabbed gently, because heavy paint bleeds under stencils and ruins the crispness.
I also chose a tone close to the diffuser color, more whisper pattern than look at me, because subtle detail is what reads luxury.
In my case, I used a warm greige paint so it complemented the new brass tone without shouting.
Step 5: Reassemble, then add one final expensive touch
Once everything was dry, I reassembled the fixture and stood back in the doorway, because checking it from a distance tells you the truth. Up close, you notice every brush mark.
From the doorway, you notice the overall impression, and the overall impression is what matters.
The brass-toned rim gave it warmth, and the faint stencil detail gave it personality, and suddenly my laundry area looked like I had chosen a fixture on purpose, not like I grabbed the cheapest thing that existed.
The Result: Brighter Laundry, Less Annoyance, More Calm
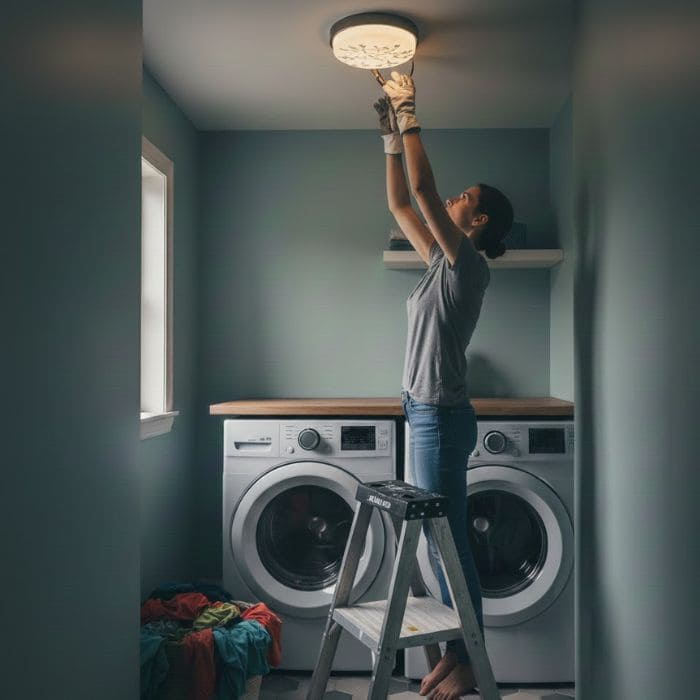
The funniest part is that I started this project because the light failed, but it ended up changing how the room feels when I walk in.
Laundry is still laundry, but it no longer feels like I’m doing chores in a dull corner of the house, and I didn’t have to spend a lot to get that shift.
This month has been full of repairs, and I’m still trying to be careful with money, but this one felt like a win because it was practical and a little bit pretty, which is my favorite kind of home project.