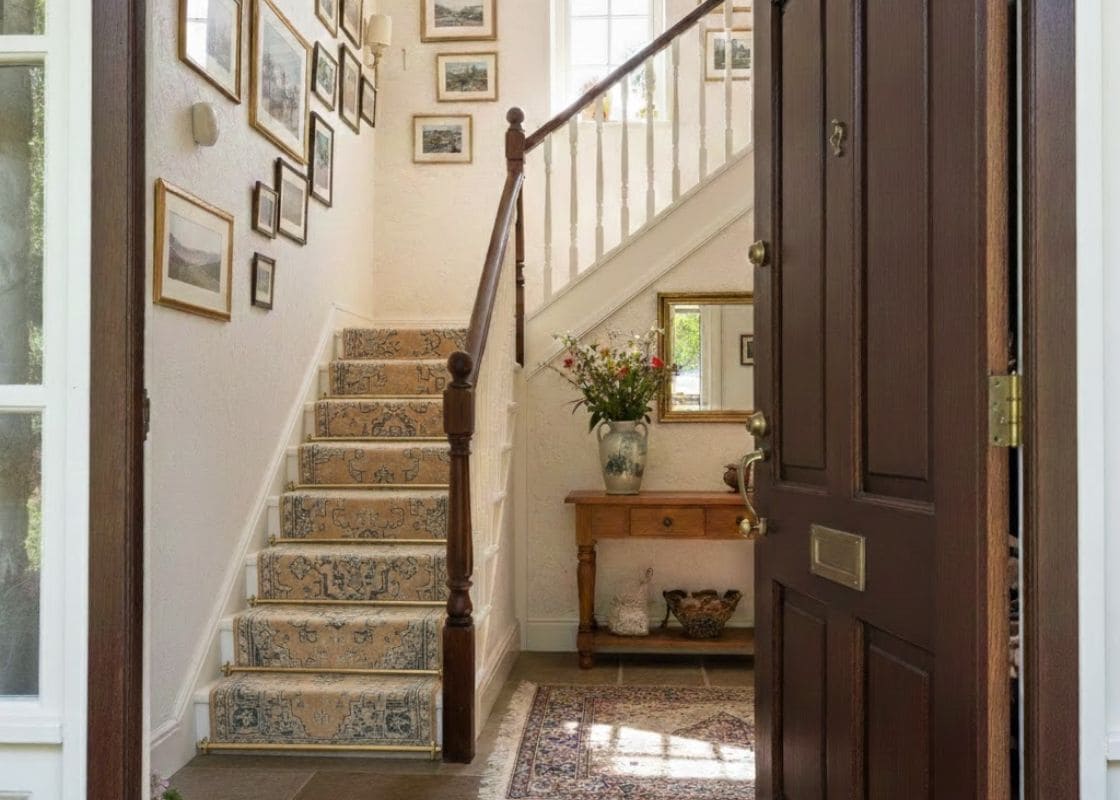
Do you remember my entrance staircase, the one that always felt a little too bare no matter how tidy the entryway was, because bare stairs have a way of making a house feel slightly louder and less welcoming the second you walk in?
Last Saturday I finally finished it with a new stair runner, and the change was immediate in the most satisfying way, because the steps stopped feeling slippery and echo-y, and the whole entrance started reading as warm and finished instead of “I’ll get to it eventually.”
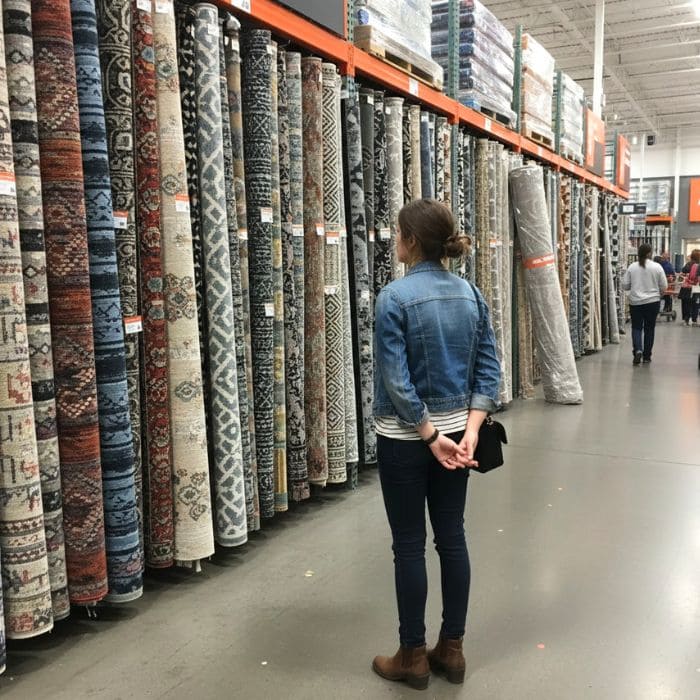
I’ll be honest, I put this off for a long time because stair runners can be deceptively tricky, and I did not want to spend money on something that ended up looking crooked, wrinkled, or too short, especially in a spot you see every single day.
Still, after a season of small projects that have slowly made my home feel softer again, this one felt like the right next step, because the staircase is the first vertical line you notice when you enter, and it sets the tone for everything else.
Where I Bought My Runner
I bought my runner through Home Depot, partly because it fit my budget this month, and partly because I wanted a simple return process if the color looked wrong in my lighting, which is always the real test.
I ordered a few options online to compare, then picked up the supplies in-store in Boston so I could get everything in one trip, because stair projects are the kind that fall apart when you realize you’re missing one small item and you lose momentum.
If you prefer a truly custom runner, you can absolutely go that route, but I wanted something durable, classic-looking, and affordable, and I was confident I could make it look polished if I handled the measuring and install carefully.
The Runner Color and Pattern I Chose
This is the part I did not want to wing, because color and pattern decide how forgiving the runner will be in real life.
I chose a warm oatmeal base with a faded, vintage-style pattern that mixes soft charcoal and muted blue in a low-contrast way, almost like an old rug that’s been gently worn in the best possible sense.
The reason I went with a pattern instead of a solid color is practical: entry stairs collect dust, crumbs, and little paw prints faster than you expect, and a subtle pattern hides daily life without making the staircase feel busy.
The oatmeal tone also matters because it warms up the entryway immediately, especially in winter light when everything can feel cooler, and the muted blue ties back to the calm tones I naturally gravitate toward in the house without turning the stairs into a statement piece that demands attention.
If you’re choosing your own runner, my honest advice is to aim for one of these real life friendly looks: a heathered neutral, a small repeating pattern, a vintage-fade style, or a tight stripe that’s not too high-contrast, because those options age well and hide the normal mess of a working home.
My Staircase Measurements and the Sizing Math That Kept Me Sane
My entry stairs are about 36 inches wide, and I wanted a runner that left a clean strip of wood showing on both sides, because that border is what makes the runner look intentional instead of like carpet someone slapped down.
Runner width
I went with a runner around 27 inches wide, which leaves roughly 4 to 4.5 inches of wood visible on each side, depending on your exact stair width and how perfectly centered your runner ends up.
That proportion looks balanced on a standard 3-foot staircase, and it also gives you room to secure the edges neatly without the runner feeling cramped against the wall.
Runner length
For stair length, the key is remembering that you’re covering the tread and the riser for every step.
A simple way to estimate is:
- Length per step = tread depth + riser height
- Total length = (length per step × number of steps) + extra at top and bottom + a little buffer
For example, if your tread is about 10.5 inches and your riser is about 7.25 inches, then each step uses about 17.75 inches of runner.
Multiply that by your number of steps, then add extra length at the top and bottom for a clean finish, and finally add a buffer so you’re not sweating every cut.
The buffer is not waste, it’s insurance, because the most stressful moment in a stair runner project is realizing you measured perfectly on paper but real stairs have tiny variations, and those tiny variations add up.
The Material I Chose, and Why It Matters More on Stairs Than Anywhere Else
Stairs are harsh on textiles, so I prioritized durability and grip over anything delicate.
I chose a low-pile runner with a firm weave that feels stable underfoot, because plush piles can look beautiful at first and then flatten quickly on stairs, and they can also feel slippery under socks. Low pile is also easier to vacuum, which matters in an entryway where dirt and grit show up first.
If you’re deciding between materials, here’s the real-life way I think about it: you want something that can handle daily foot traffic, hold its shape, and stay looking decent when you are not treating it gently, because stairs are not a gentle place.
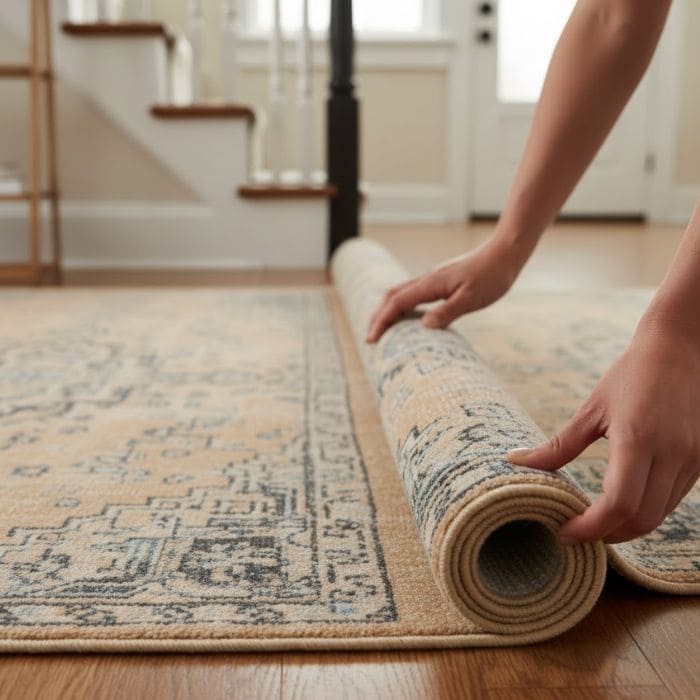
Padding: The Hidden Detail That Makes It Feel Good and Look Better
Padding is what gives a stair runner that soft, quiet feel, and it also helps the runner lie smoothly because it fills tiny imperfections in the stair surface.
I used padding cut slightly narrower than the runner so the edges stay crisp. In practice, that means if your runner is 27 inches wide, you cut the pad around 24 to 25 inches wide, which prevents bulky edges and makes it easier to secure the runner cleanly.
How I Secured It and the Supplies I Used
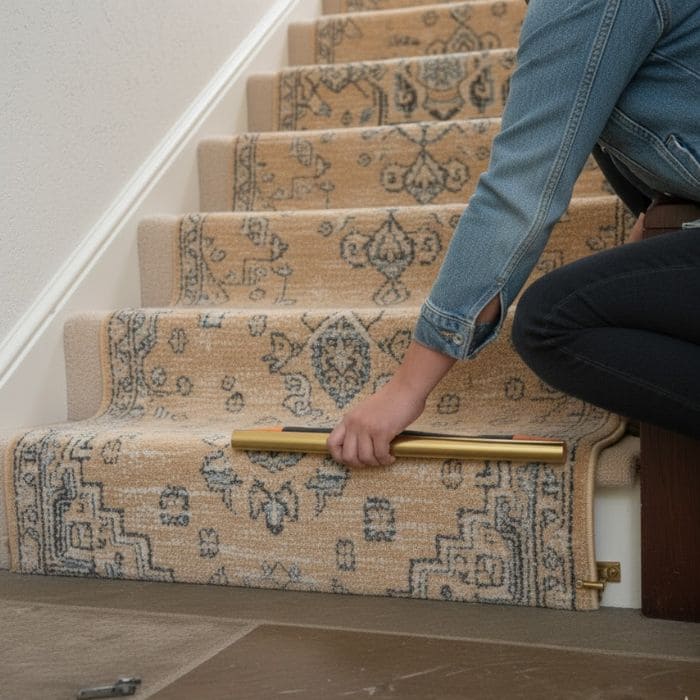
I kept the installation method practical and reliable, using the same general approach you’ll see in Home Depot’s stair runner installation guide: pad first, then runner placement and securing.
Supplies I used included:
- stair runner
- rug pad / carpet padding
- measuring tape and pencil
- utility knife with fresh blades
- staple gun and staples
- double-sided carpet tape (to help hold padding where needed)
- optional tack strips, depending on your stair and preference
If you choose tack strips for extra hold, Home Depot sells carpet tack strip products for flooring projects.
I’m careful with tack strips and stairs, because I want it secure, but I also want it safe, and I don’t want sharp surprises if someone walks up barefoot.